leather elephant

leather elephant

Tuesday, March 19, 2013

Clay-relief Sculptures of Sarguja


Every year after harvest there is a big festival called Chherta where every house is repaired, whitewashed, and freshly decorated with clay reliefs...women try to outdo each other to make their houses the most attractive. These become incredibly vivid 3-D murals with characters half on/half off the wall, other materials like string and wire are added as well. Whitewashed backgrounds have radiating and/or swirled-line grooves that the women make using their fingers.
For individual project panels, children could create backgrounds using white paint on cardboard, swirling their fingers in smooth strokes to create a similarly textured canvas...(tempera or acrylic paint could be thickened with cornstarch or gel medium to hold the texture). In a subsequent class they could create characters using a theme like 'playing with friends' or 'climbing a tree.' Construction paper collage would work but shouldn't be glued down to the background all the way, as some 3-D effect best captures the real thing. True 3-D with paper mâché pulp or model magic would be great. Either way, found elements like string and wire should be incorporated.
This would make a great mural project as there can be multiple work areas, and everyone doesn't have to be standing at the mural at the same time. Real whitewash can be used, its lack of true opacity and its affordability, not to mention its authenticity, would be great. A collaborative mural wherein children from different classes and grades contribute their 3-D objects and they are attached to the wall by a teacher or by an older class would work nicely.

Click here for a video tour of the mural:

Saturday, March 16, 2013

Maru Potters of Rajasthan

The Maru potters did not believe, as some cultures did, that deities reside in stone but rather in clay because of the nature of its elements. They believe a pot is like a person in that there is a birth and a death (the inevitable break), and that a broken pot will eventually return to nature, as people do. Likewise, they believed that a good potter perspires when he kneads wet clay which means potter and clay permeate each other and become one. The clay becomes infused with the potter, the potter takes on elements from the clay as well. In some villages the potters are also priests, taking the respect for this profession and its proximity to the life and death cycle to another level entirely.
This is not an art lesson idea as much as an invitation to rethink how clay is presented. In every clay program children are taught to pound and work the clay in a rough manner in order to prevent air bubbles which could cause items to explode in the kiln. The kneading is billed as being necessary in order to prevent something bad from happening, not as something beneficial in its own right. I think it would be a great visual for clay-workers of any age to have when conditioning their own clay--imagining that the true goal is to become 'one with the clay' through the hard work of kneading and pounding. In fact, now that I know this reason for wanting sweat to mingle with clay, it seems like a wasted opportunity if a potter's only goal is such a mechanical one.
Here he is in action, mixing lots of sand into the clay, as well as mica. The clay is fired in a outdoor kiln at about 650*F.

Friday, March 15, 2013

Bandhani Tie-Dye

Tie-dye is a common technique with an almost magical element of surprise when the twisted, knotted piece is unravelled and the colors and patterns are revealed.
Bandhani (means 'to tie' and is the origin of the word bandana) fabrics are knotted with hundreds of little knots, sometimes at random, sometimes along a washable blue stencil. Traditionally the women tie the knots, and whisper secrets or share stories while they tie them. Later when the fabric has been dyed (by men) and unknotted, by simply tugging it open, the woman (often a bride) who wraps herself in it is essentially cloaking herself in women's experiences. The knots are made by pinching little bunches of fabric together and then wrapping thread around the bunch many times, some women can tie as many as 700 knots in a day. When Bandhani are sold, the knots are left in so the buyer can be sure she isn't purchasing a fake.
Introducing this technique as part of any tie-dye lesson or activity would enrich the experience of preparing the fabric to be dyed. These secret-bearing knots could be one option alongside more common twists and rubber bands. In fact, introducing the idea of attaching secrets or stories (by giving voice to them as you work) to any kind of tie-dye preparation be it regular strings or rubber bands, thereby infusing the end product with such importance, would be a wonderful and memorable practice. In keeping with the communal gift nature of the process though, an entire class could work together on a large piece of fabric, while reminiscing about childhood memories or experiences from that year in school. The resulting fabric could be given then, as a gift to a departing teacher, or other important figure from their shared experience.

Tuesday, March 12, 2013

Kolams (Rangoli) Chalk Stencils

In Pondicherry in the south of India, women decorate the ground in front of their house every morning with designs called kolams. They use a mixture of rice flour and pigment and use templates or work freehand. It was believed that it was important to always have a welcoming home, and the fact that creatures like birds, squirrels, and ants would eat the rice flour was a part of this idea of providing an inclusive environment (also Lakshmi, the goddess of posterity might show up!). As the day goes on the kolams are trampled and the artwork disappears and then the next morning the women sweep and wash the ground (sprinkling it with water) and reapply them, making a brand new design each day. It is important that every line is closed, to prevent evil spirits from entering. Women stand up, but bend over the entire time they create, and so it's considered to be good for digestion, reproductive organs, and a good form of morning exercise and stretching. Modern templates are made by using blue block-out on silk screen-like screens (round) or by punching holes in tins...a handful of rice flour goes in the tin and when the tin is tapped on the ground the pattern comes out. Fancy borders are made using tubes that have holes punched in them..traditionally they were made out of (clay or) tin but the ones I saw from Pondicherry were just thin lengths of PVC piping. The little tubes are packed with rice flour and then rolled on the ground to make patterns for the borders.
We could replicate the tin stencils by punching holes in sturdy paper plates. And thin cardboard tubes (the kind that come with wrapping paper) would be great for rolling borders. This could be a fun and meaningful school art project, if teams of children were to be assigned the front of the school from one day to the next. It's a nice step up from sidewalk chalk, and would also be a wonderful introduction to the idea of impermanence in artwork. Design and pattern suggestions can be found at http://www.ikolam.com/
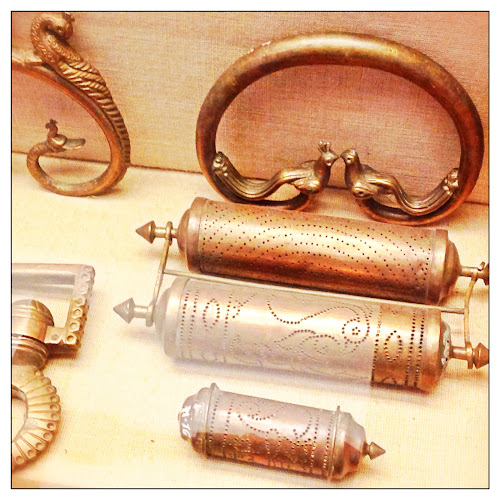
Here are the stencils:
This is what it looks like when the rice flour is pressed through:

Monday, March 11, 2013

Tagore Doodles

Painting didn't come easily to Nobel prize for Literature winner Rabindranath Tagore though he worked at it for a long time. He did however make a habit of turning his written mistakes, cross outs, etc into elaborate drawings and doodles as he wrote. "He turned struck-out words into ornamental motifs and sometimes linked the scratched out words on the pages of his manuscripts into an art-nouveau-like arabesque .....Victoria Ocampo who spotted these during his stay in Argentina as her guest was impressed and found artistic merit in them. "He played with erasures,‟ she wrote, "following them from verse to verse with his pen, making lines that suddenly jumped into life out of this play: prehistoric monsters, birds, faces appeared.‟'* Tagore went on to be recognized as a great painter, and was the first Indian artist to have artwork displayed around the world.
*Current Exhibitions Upcoming Exhibitions Past Exhibitions. "Rabindranath Tagore: The Last Harvest | New York". Asia Society. Retrieved 2012-12-18.
As a way to acknowledge and reconcile our own inevitable 'mistakes and cross-outs' I think it would be great to collect them in the art room as the year goes by, or encourage other teachers to contribute, and have children choose 'a mistake' to use as a starting point for any type of artwork, depending on the materials at hand and the time frame. It could be the community scrap bin that kids turn to when they finish with something else or they could be distributed randomly and incorporated into paintings or collages, sketches, etc. imagine a whole display of artwork made from other people's mistakes or false starts. It sends a good message about upcycling as well.

Tagore 1861-1941


Tagore's own signature:

Thursday, March 7, 2013

Gond Paintings


The Gond people believe that viewing a good image brings you good luck so it's no surprise that their paintings are so joyful. They make the paintings on the walls of their houses to mark special occasions and only recently started to paint on paper with poster paints. Animals and nature scenes dominate these paintings, which consist of a simple single color shape filled with dots and lines described here as being: like undulations of song, like fables within tales, colourful dots and lines chase each other in close succession. Immense patience and delicate brush strokes are part of the meditative process. The Gond tribe was known for storytelling and song, and a connection could be made between that and the rhythmic energy of their heavily patterned artwork. One artist I spoke to told me the inspiration for the dots and dashes that fill the animals is rice, and the article I linked to above says they are evocative of the tattoos on the Gond women. The simple graphics combined with intricate patterning and vibrating colors provide instant inspiration for artists of all ages.

After outlining their animal shapes with pencil, children should choose one main color in acrylic or tempera paint to fill them in. Good quality markers or sharpies could be used for the patterning, or detail brushes and paint in both bright colors, black, and white. This could also be a great collage project, a photograph of an animal could be traced and cut out of fadeless paper or traced once onto multiple layers of colored tissue papers. Once those papers have been glued to a white background, acrylic paint can be added with a detail brush or toothpick. Dots, lines, and dashes can be used or students could think of a pattern that has some special significance. Add a black marker outline for a final touch.

Wednesday, March 6, 2013

Scissors


There are a lot of fascinating artifacts in the Museum of Everyday Objects at Sanskriti Kendra. For centuries Indian artisans have found clever ways to decorate their utensils and tools. I thought that these ancient scissors look a little bit like bird faces, but I have to admit I was surprised that they weren't a bit more playful, since on a wall nearby there were faucets with animal heads, nut crackers carved to look like people, locks that looked like birds, etc. (see pictures below).
Make your own pair of scissors using cardboard and a brass fastener. Look at a pair of scissors.  What would you do to make this pair of scissors more interesting? Brainstorm clever ways to design your own pair of scissors, consider things that open and shut, two things that might be joined together? Opposites? Things that come in pairs? Sketch an idea first so you can visualize each section. Draw the two sections side by side on shirt or recycled cardboard, remembering to leave a finger/thumb hole at the end of each section, then cut out carefully and assemble with a brass fastener. Scissor parts could be paper mached before they are attached with fastener, for a more involved project.

Tuesday, March 5, 2013

Terra cotta Horses of Aiyanar


These enormous (larger than life) horse sculptures were created by villagers so that the protector Aiyanar could ride them at night to chase away evil demons, thereby ensuring good luck for the town. Different horses from different areas were decorated with different types of objects and creatures. These horses are made, in pieces, on the wheel, seams are hidden under decorations. If you were in charge of designing your own village's horses, what sort of decorations and patterns would you put on them?
Cut a large horse out of red or brown paper, draw it first in chalk, making sure to have tips of ears, tail, nose, and hooves touch the edges of the paper. Decorate your horse using black or white marker, crayon, or chalk. Or use white or black paint and detail brushes. Would be a great clay project as well--once horse has been created, use coils and small balls of clay for all sorts of decorations. Another approach would be to collage decorations onto a painting of a horse.

Monday, March 4, 2013

Red-faced Monkeys of Delhi


The kindergarten kids loved hearing my stories about the trouble-making red-faced monkeys in Delhi. The monkeys broke into the kitchen and destroyed the salad, stole Marilyn's cashews and dried fruit, followed me ominously when I was with Richard who carried oranges, and ran in the main road alongside traffic near the National Museum. The girls also enjoyed hearing about how these creatures plague the American School so much that sometimes the school hires men to bring huge but friendly black-faced langur monkeys to the yard on leashes to walk around and scare the red guys away.
We looked at pictures of the monkeys and talked about what we saw. I asked a few questions out loud and let children shout out their answers, I didn't dwell on 'right' or 'wrong' answers, but wanted to make sure they were noticing and thinking about what they were seeing. I asked 'are their eyes close together or far apart?' 'Are their mouths smiling lines or straight lines?' etc before inviting them to make these marker and colored pencil creations. They were challenged to make parts of the monkey touch the edges of the paper (and were allowed to say 'bump!' whenever their markers hit the edge, which is a great way to encourage bold drawings). Colored pencil choices were limited to a few different browns, pinks, and reds so the artists could have some freedom but not get too far off task. In subsequent lessons early finishers have been asked to make pictures in their sketchbooks of monkeys being bad. They love that assignment.

Sunday, March 3, 2013

Raja Ravi Varma Embellished Prints


Embellished prints of Indian deities, on view now at OJAS gallery in Delhi. RRV was a prince who created lithographs (using oils?) of Indian gods and goddesses, very colorful classic imagery, in the mid 19th century. What makes these so interesting is that at some point the final prints were embellished with fabric, sequins, embroidery thread, gold, etc. I'm a huge fan of printmaking with kids, and feel that the fun can really begin once the plate has been created and the actual printing begins. This type of embellishment would be a really great third step (carve, print, embellish) after a big printmaking project and a fun way to explore different techniques applied to exact same images. Printing could be done using linoleum, collagraphs, or styrofoam...onto sturdy paper, and then embellished once dry. Elmers glue would be good for most of the materials, and one whole class could be set aside for sewing so conflicting techniques aren't happening at once. I always encourage children to keep every print, and then choose an unsuccessful image as a beginning of a multi media exploration. In this case that could be a good starting point for this type of experimentation. Another way to approach this might be to start with color copies (also on card stock or other substantial paper) of photographs that children take, lively scenes with many people or objects would be a good starting point.

Saturday, March 2, 2013

Gujarat Mud Mirror Work

This is a great example of combining unexpected materials. Mud surface is flat and mirrored mosaics add depth. Found on the outside of thatched roof huts, and in some interiors. Children can design their own Gujarati style huts by embedding bits of aluminum foil in white paint (thickened with rice flour or some other medium, sand might work as well?). Foil bits should be cut and close by on the same day as the painting, so the bits can be pressed down into wet paint. Children should consider pattern and symmetry as they plan and execute their designs and consider important details like windows and doorways. Huts can be finished with straw on top for a roof.

Friday, March 1, 2013

Painted Trucks

Highly decorative trucks and lorries, bright colors, fanciful images, roosters, and flowers, tassels inside, etc. this is one way a truck driver advertises his pride in his job, and his vehicle. If you were choosing a truck to transport your items you might be greatly influenced by these decorations and the energy the driver put into his truck. invite children to transform a common object or machine using similar techniques, use your imagination, make it special, make it stand out. Could be fun for middle school, esp. Would be a great multi- media project, transform a serious sketch with fanciful add-ons like fringe, pom-poms, rhinestones, etc. or simply add colored magazine papers to black and white sketch or newspaper collage. Check out this blog for a great article on the painted trucks.

after making paper mache vehicles, and embellishing them with sequins, paint markers, bottle caps, etc. the artists were invited to draw their creations.